Instagram has finally deployed a feature to support live streaming fed from external sources. Many of you – including us – have been waiting for such a feature for years! In the past, you could only stream from external sources to Instagram using unofficial workarounds. Now, with a Professional Instagram account, you can live stream with any of our current TriCaster line. How can you set it up? If you haven’t enabled your Professional account, please follow these steps first:
A step-by-step guide
- Please visit instagram.com and sign-in with your professional account credentials.
- Click on More (bottom left corner) and Settings (first entry in the pop-up menu).
- Click Account type and tools, and Switch to Professional Account.
If you have already set your account to professional mode, the steps are simple:
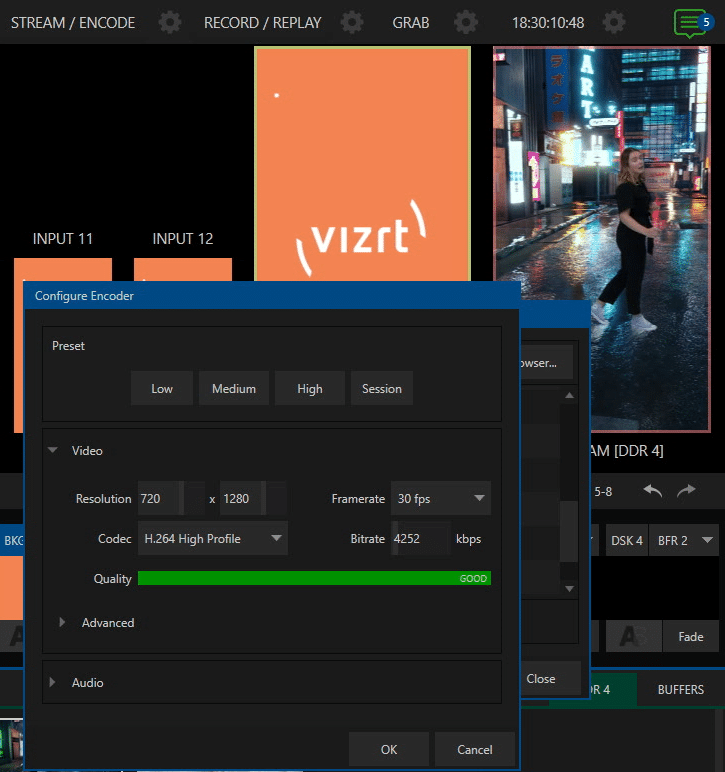
First you must set up your TriCaster, following Instagram’s suggestions on the video format:
- 9×16 aspect ratio (recommended but not required)
- 720p @ 30 fps (note: 30 fps is recommended, but Live Producer can also support 60 fps if desired. When using 60 fps, the Live Producer preview screen will still display 30 fps. This is normal and we are currently investigating how to correct this.)
- Resolution: 720×1280
- Video bitrate range: 2,250–6,000 Kbps
- Alternatives (supported but not recommended): 480p @ 30 fps, 360p
Audio format – the settings below are the default for most streaming platforms:
- Sample rate: 44.1 KHz
- Channel layout: Stereo
- Bit rate: up to 256 Kbps
If the Digital Session Formats are available in your TriCaster, you can use a 9:16 session without the need to crop, rotate, or do anything else. You will simply natively produce your content in 9:16.
Creating a new live stream session
Please create a new session using a 9:16 Session format, and when you get into Live Desktop Mode, click on the gear icon next to streaming, and set up your encoder (1, 2 or 3) with the video format suggested by Instagram.
If your live stream requires both a 16:9 (if you plan to send your content to YouTube too, for example) and 9:16 to send to Instagram, please create a regular 16:9 session.
In this case, as the suggested stream resolution is 720P, you can start a 1920x1080P session. When you set up the streaming encoder in a 16:9 session to generate a 720×1280 stream, it will center cut from the Full HD image, so you will have 607×1080 pixels to work with.
The TriCaster will upscale your stream to 720P resolution. In the case of a TriCaster Mini series, TriCaster 410 Plus, TriCaster 1, or TriCaster 1 Pro, this might be your only option if you want to create different MIXes using Mix Effects for different aspect ratio outputs.
In the case of using a TriCaster 2 Elite or TriCaster Vectar, if you set it to 4K mode, you can leave one of your outputs in 4K (and you will get the full 720P resolution center cut), and you can still create 1x4K or 4xFullHD outputs for your 16:9 stream.

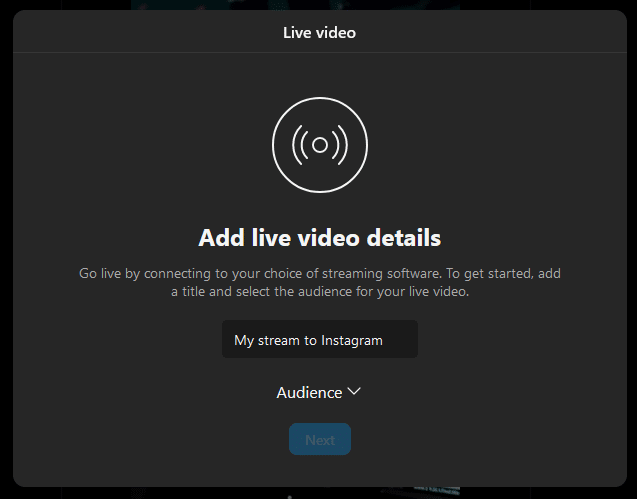
Now we have set up our session and encoders the way we wanted. However, we should also create the stream on the Instagram site and add set up the streaming templates within the TriCaster. The next step is to head back to Instagram.com from a browser, and click on “Create”, then click on “Live Video.”
A pop-up window will appear, asking you to name your live video.
Don’t forget to test in practice mode
Before you can continue, you’ll need to choose your audience. “Public” and “Practice” mode are going to be your two options.
Practice mode is perfect for tests. You should keep in mind that “Public” mode will automatically start your stream when you go live and notify your followers.

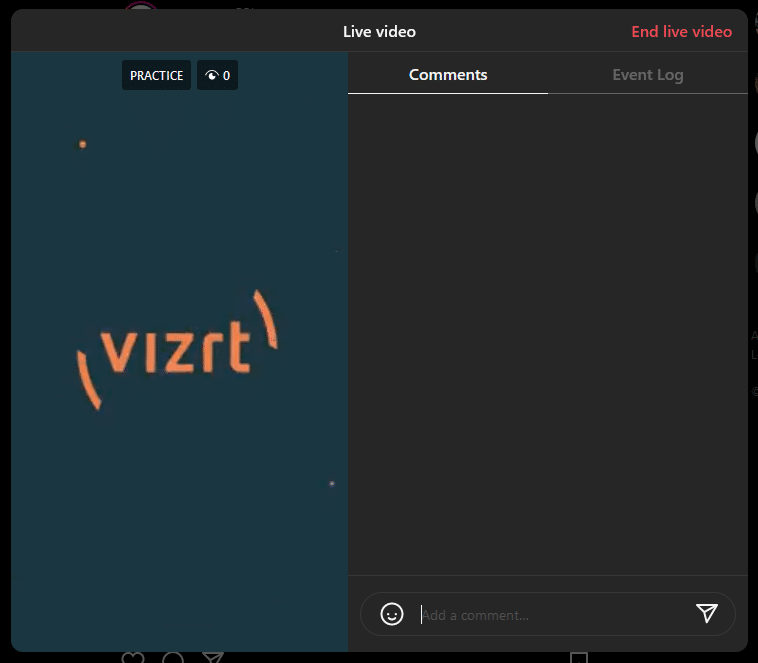
After selecting your audience, the live video window will pop up, generating a unique Stream URL and Stream Key. Please copy the Stream URL and Stream Key, as you will need both in the TriCaster.
Navigate back to the TriCaster, click on the cogwheel icon of the TriCaster Streaming / Encoder menu, and create a new Custom Preset.
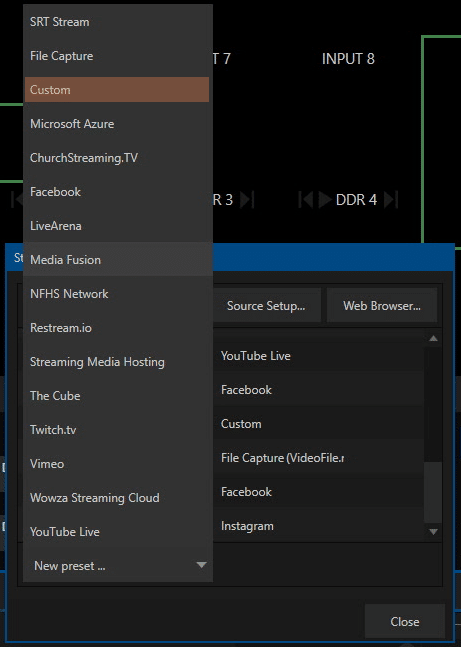
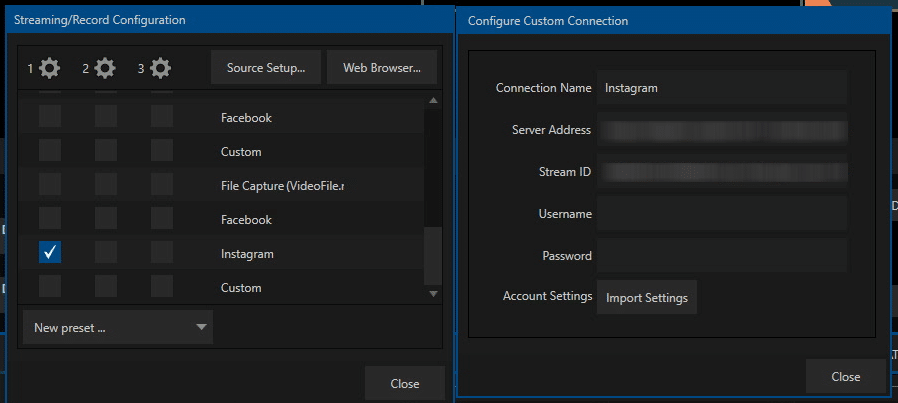
Please name your connection. In this example, we chose the name “Instagram”. The copied Stream URL from the Instagram dialog window (starting with rtmps://…) should go to the Server Address field, while the Stream Key should be copied to the Stream ID field.
Please assign the correct encoder (1, 2 or 3) to the new template that you set up earlier (see the checkmark above).
If you’ve done everything correctly you should see the live video appearing on your Instagram live page. Click on ‘Go Live’ and enjoy your Live Stream to Instagram using your TriCaster!
New ways to communicate, new connections made
With the ability to use your TriCaster for live streaming to Instagram, you’re sure to see increased engagement and reach using an entirely new way of communicating with your followers.
We suspect Instagram will continue the development of its live stream features as more businesses and organizations use professional gear to create content, instead of individuals live streaming from their phone. Speaking of further developments, Instagram, it would be great to automatically rotate a 16:9 source to 9:16, and not do center cuts!
Before you head out to try live streaming to your Instagram from your TriCaster, we wanted to offer some tips and tricks:

- If you choose to send a 16:9 stream to Instagram, it will center cut and zoom to utilize the 9:16 screen layout
- Make sure your setup in the TriCaster is ready, as whenever you hit “Go Live”, Instagram will automatically start your stream
- TriCaster is going to offer you Safe Zone overlays on the viewports, so you will know what is going to get cropped from the 16:9 source. Right click on the viewport, navigate to Overlays and choose “9:16 Safe” – this can be applied on any viewport (inputs, media players, PVW, PGM)
- Always test your stream setup choosing the “Practice” Audience before you really go live!
- Rotating an ENG camera or DSLR on its side will create a 9:16 aspect ratio video on your inputs, and we support rotating on input – so you can use NDI, SDI, HDMI, etc. sources (depending on which TriCaster model you have)
- You can utilize Mix Effect rows, and assign them to different mixes, to create different looking / aspect ratio / branded outputs
- Please always make sure you are sending the actual MIX output you want to the Streaming Encoder. This can be set up in the output configuration menu (Click on the cogwheel on the PGM Output viewport, or in the Streaming / Encode configuration window click on Source Setup will lead you to the same menu)
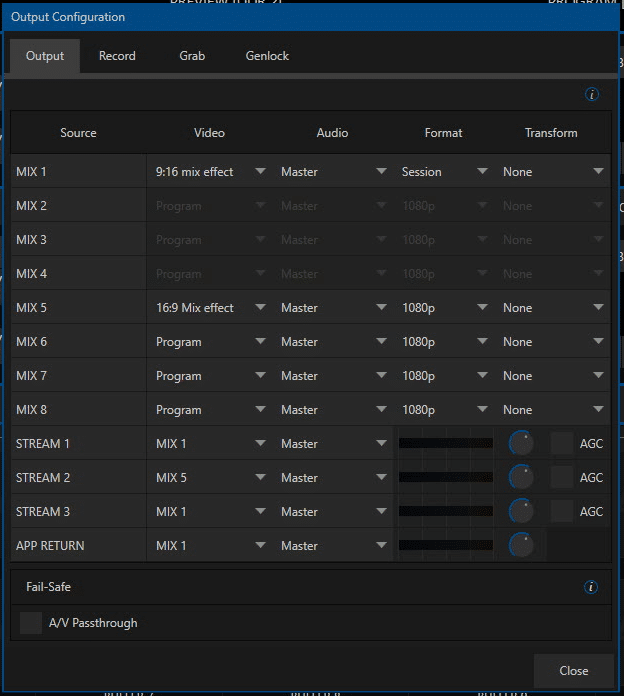
- In our example the 4K MIX1 output is being sent to Streaming Encoder 1, while MIX5 to Streaming Encoder 2
- The Stream ID or Stream Key is unique for every Live Stream, so you have to follow these steps every time you plan to go live on Instagram!
- The TriCasters are supporting DVE (digital video effects) on Mix Effect rows, or on DSK/Keyer layers so you can rotate, enlarge, shrink or even rotate in 3D your video sources live
We will continue to add more insights on best practice when it comes to live streaming on Instagram with your TriCaster, as new features and capabilities arise. Our resident TriCaster Tutorial expert Richard Evans also outlined this all in a short video walking you through step-by-step: